GMX is a free ad-supported email service provided by 1&1 and Fasthosts Internet for both personal and business use.
It offers one of the safest and most secure email accounts in the world so that its users can have an incomparable emailing experience with the assurance of excellent security.
In addition to email addresses, each GMX account includes – a mail collector, address book, online calendar, organizer, unlimited file storage, up to 50MB of attachments, an automatic antivirus and spam filter, and POP and IMAP services.
To add more to the list, let us tell you that each GMX user can register up to 10 individual GMX email addresses. So, because of these most amazing benefits and features; currently, GMX Mail has over 11 million active users.
However, its unmatched popularity intrigues individuals to connect with this platform but, this doesn’t change the fact that there are many users who hardly know enough about this platform to easily sign up for a GMX account and sign into the same.
Though GMX’s unmatched popularity makes people eager to join this platform, but, that doesn’t change the fact that there are many who hardly know enough about this platform to sign up and sign in to a GMX account with ease.
So, if you’re also one of those then, worry not! We’ve got you covered. Below is explained how you can sign up for a GMX account and once you successfully create an account on a GMX account then, how you can log in to your GMX account.
So, if you are one of them too, don’t worry! We’ve got you covered. Below is explained how you can sign up to join GMX Mail platform and how you can log in to GMX once you have successfully created your GMX email account.
Note: Those who already have an email account on GMX Mail and are having trouble accessing the correct ‘GMX Email login page’ to sign in to your GMX Mail account—can skip the sign up section and straightaway jump to follow the sign-in steps for successful GMX Login.
How to Sign-up & Create Your Free GMX Mail Account?
Signing up on GMX to create an email account is such a simple and straightforward process that it requires following these steps—
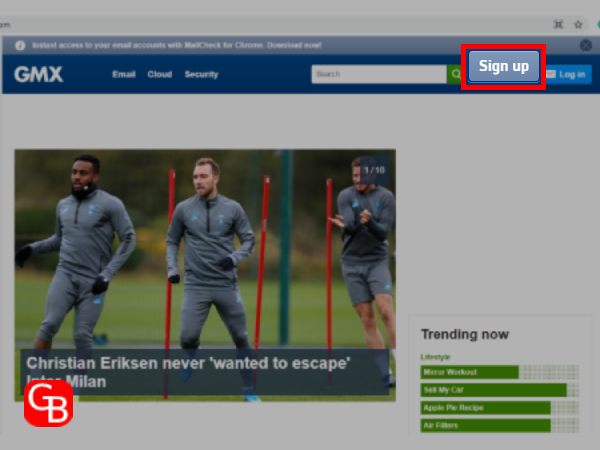
- Step 1: In order to sign up for an email account on GMX Mail, you first have to reach onto the GMX official website using your regular-used internet browser. For that, you must use this link https://www.gmx.com/.
- Step 2: There, on the homepage of GMX Mail website, click on the gray-colored “Sign-up” button which is there in the upper-right corner of the screen. In doing so, you’ll be navigated on the “GMX Account Creation Page.”
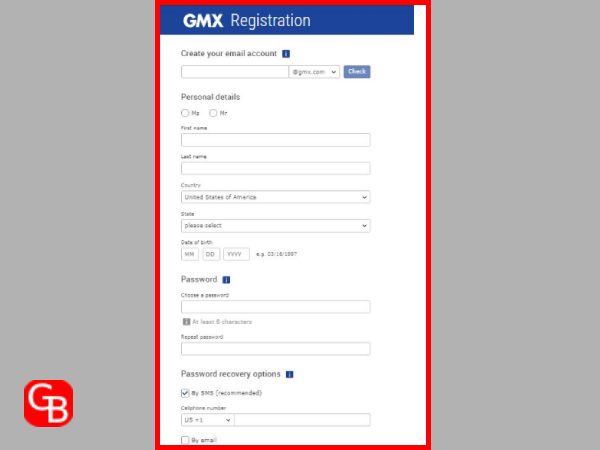
- Step 3: On the same page, what you need to do is fill the GMX account registration form. For that, you first require entering a unique “Username” in front of the ‘@gmx.com’ suffix to create an email ID for your future GMX account. Upon entering the username, click on the “Check button” to ensure whether the username is available or already taken.
- Step 4: Once you’re able to choose a unique username for your account, proceed to the “Personal Details” section and enter your following personal details —
- Gender
- First Name
- Last Name
- Country
- State &
- Date of Birth.
- Step 5: Next, you’ll need to choose a “Password” for your GMX email account that will protect your account online and enter the same in ‘choose your password’ text-field. Similarly, re-enter your created password in the ‘repeat password’ text-field for confirmation.
[Note: While creating your password, make sure it should include—1 Numeric Character, 1 Special Character & Minimum 8 Characters.]
- Step 6: After doing this, select the “Password Recovery options” and to do so, tick-mark either the “By SMS” or “By Email” box.
[Note: This will act as the security credentials for your GMX account to help you reset and recover your password and username in the future.]
- Step 7: Now, whichever option you choose, you will be asked to provide either—
- Your Mobile Number or,
- Your (Secondary) Email Address.
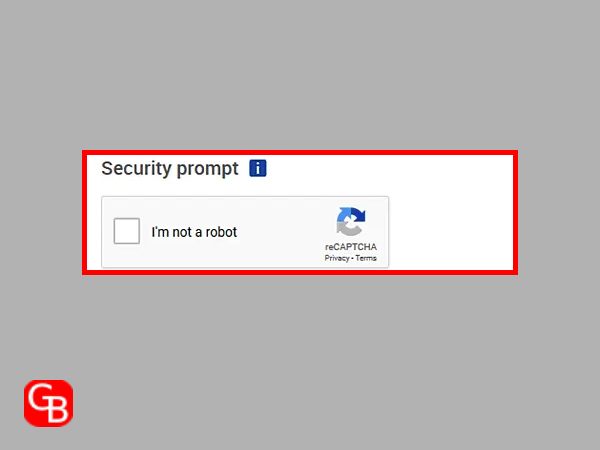
- Step 8: On providing these details, you will need to confirm that you are not a robot and for that, check the box next to “Google Security Recaptcha Form.”
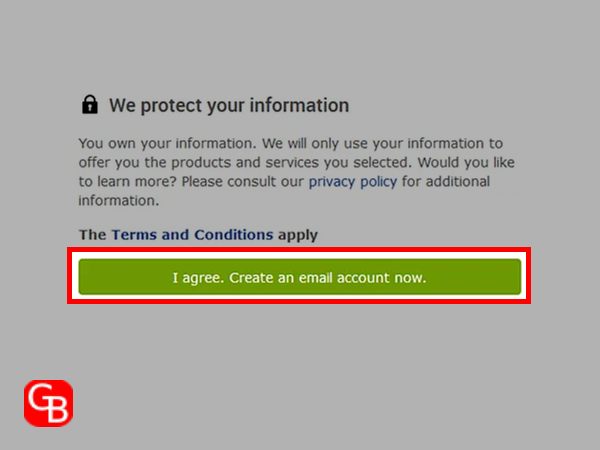
- Step 9: Lastly, make sure to read the “Terms & Conditions of GMX” which are mentioned on the same page and when you’re finished reading, click on ‘I agree. Create an email account’ button to finally complete the sign-up procedure of creating your very own GMX email account.
How to Sign-in to Your GMX Mail Account?
Once you’ve created your own email account on GMX, you can access it after following this step-by-step sign-in process—
- Step 1: First and foremost, on your regular used web browser’s URL address bar type or paste this “https://www.gmxmail.com” or https://www.emails-login.com/gmx-mail-login/ link and hit “Enter.” This GMX.com login page link will redirect you onto the official “GMX My Account Login Page.”
- Step 2: There, on the login-form, you’ve to enter details of your respective GMX email account. For doing so, type your GMX “Email ID” in the email address-text box. Similarly, type your GMX account’s “Password” in the password-text field.
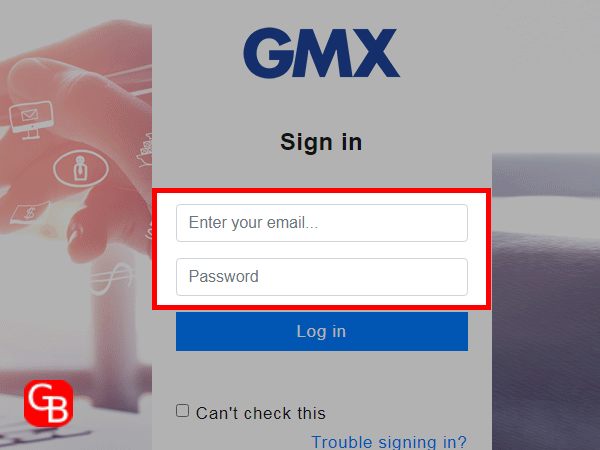
- Step 3: Upon entering the login details that are associated with your GMX account, (if appeared) you can also check the box that reads— “Remember Me.” This is to allow your browser to remember your GMX account login details and auto-fill it the next time you log into your account.
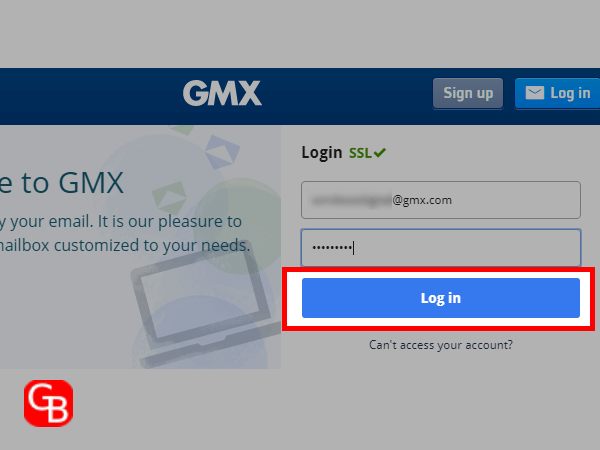
- Step 4: After that, just click on the “Log-in” button and in doing so, you will be directed to the inbox page of your GMX account.
From here, you can now manage your account as well as all your GMX emails.
So, this is the complete step-by-step sign-in process that you need to implement in order to access your GMX email account.
However, this is not always necessary as there are also situations when you face problems logging into your account.
Now the question arises—“why can’t you login to your GMX email account?”
This is simply due to GMX web login-problems, which although can occur for a variety of reasons but, in most cases this happen either due to entering the wrong login credentials associated with your GMX account or when you inadvertently try to login from the wrong login page.
How to Deal with GMX Login Issues?
If you ever find yourself in such an unfortunate situation where you can’t login to your GMX email account, we suggest you not fret! Just be calm and try your hands on the solutions given below!
Assure Best Practices for Visiting the Correct GMX Webmail Login Page
Here are three best practices for getting to the correct GMX webmail login page quickly and securely—
- First of all, you should access the official webpage. Basically, you need to go to the GMX login page to access your GMX email account using this https://www.gmxmail.com link as this is the only correct URL of the official GMX homepage.
Also, when entering the above URL in the URL address bar of your browser, be sure to use the full address.
- Secondly, avoid searching for ‘GMX webmail login page’ from a browser, search engine or your Windows search bar. Instead, you might consider bookmarking the official GMX Email login page for easy access when you want to login to your GMX Mail account.
However, if you are still in the habit of doing this, make sure not to enter phrases like ‘GMX sign-in’ and ‘GMX email login’ page etc.This is because the search engines of most web browsers do not always guarantee to show real and correct results for the pages you want to visit. Therefore, when you randomly select GMX Mail’s log-in page, you may not be able to login to your account.
- Third, we recommend that you do not use any unofficial links. They redirect your request to clone websites of the official GMX webmail login page and you can put yourself and your GMX account data in trouble when you try to log in using them.
Check Your Login Details
Since the login credentials of your account are the key to access it, you may face problems like this while login to GMX if you are careless while entering them.
Hence, it is suggested that—
- You type your most updated GMX email address and your GMX email account password into the fields on the login page.
- Double check your password as there is a high chance that you may have entered the wrong password as it is usually hidden by an asterisk.
- While entering the password, you use ‘Num Lock’ and ‘Caps Lock’ in the correct place because passwords are always alphanumeric and case sensitive.”
After ensuring all this and re-entering the correct details, click on ‘Login’ and check if you can now access your account.
Optimize Your Web Browser
Also, there is a possibility that it was your browser that caused the error when you were logging in to your GMX email account. So, make sure to clear your browser’s cache and cookies and disable unnecessary plugins/extensions to optimize it before your next login attempt.
Apart from this, also make sure that you are using the latest version of your web browser as older versions sometimes do not support the new updates of websites like GMX and thus, create such problems.
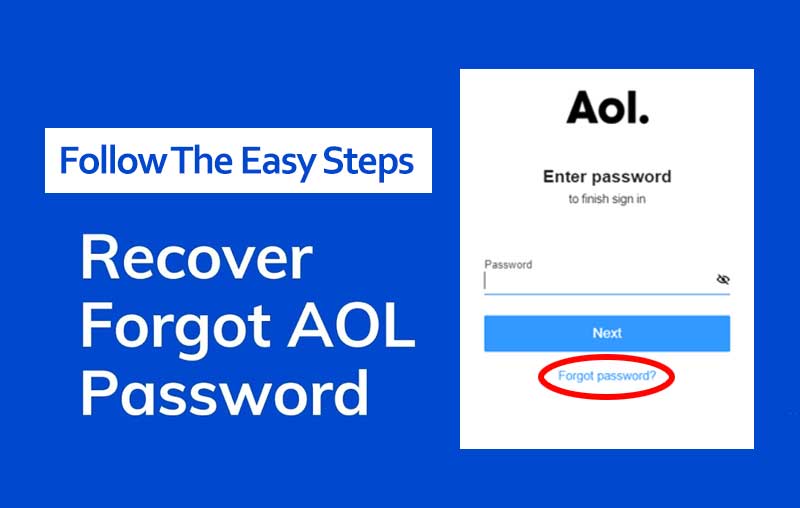
Recover Password
If you do not remember your account password and hence facing issue with GMX login, you can easily recover it by following these steps—
- Step 1: To start, you need to open the “GMX login page” where you type your credentials.
- Step 2: Then, click on the “Can’t access your account” link which is available beneath the login button on the GMX login page itself.
- Step 3: This will redirect you to the “GMX Help Center Page” where you can easily find out different ways how you can successfully access your account again. However, to be specific, since you forgot the password, simply go directly to “Forgot your password?” option and click it.
- Step 4: As soon as you do this, you will be further taken to a new page where you will be asked to fill the required details on a form. On entering the asked details, click “Continue.”
- Step 5: Now that you have completed the required form, just click on “Send.”
- Step 6: After receiving the form, GMX’s help team will contact you and help you reset your password.
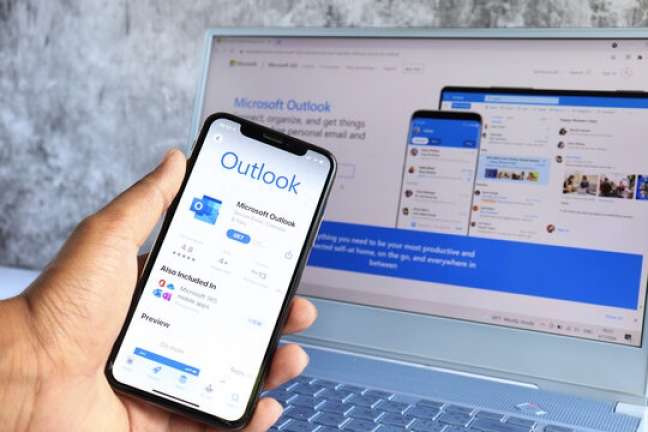
Configure GMX Account in Third-Party Email Client (Like Outlook)
In addition to the solutions, if you want to get rid of GMX webmail problems completely, consider configuring your account in a third-party email client instead of accessing it through a webmail client. For that, you need these IMAP (Incoming) and SMTP (Outgoing) GMX Email Server Settings—
GMX Mail IMAP Server Settings
- IMAP Server: imap.gmx.com
- IMAP Port : 993
- IMAP Security : SSL
- Authentication: Required
- IMAP Username : Your full email address
- IMAP Password : Your GMX account password
GMX Mail POP Server Settings
- POP Server: pop.gmx.com
- POP Port: 995
- POP Security: SSL
- Authentication: Required
- POP Username: Your full email address
- POP Password: Your GMX account password
GMX Mail SMTP Server Settings
- SMTP Server: smtp.gmx.com
- SMTP Port Number: 25 (No TLS/SSL required)
- SMTP Alternative Port Number: 465 (With SSL)
- SMTP Security : SSL
- Authentication: Required
- SMTP Username: Your full email address
- SMTP Password: Your GMX account password
Conclusion
This is all about how those who don’t have an account on GMX can easily create one using “GMX Mail Sign-up Procedure” and those who already created, can login to their respective GMX email account using the “GMX Mail Sign-in Procedure” mentioned here. Also, if you are facing difficulties in the GMX Mail account login process, we’ve discussed some of the easy-to-go-through solutions that will help you get rid of your GMX email problem.
Read Also: